In this tutorial, we will demonstrate how to setup Google Analytics on your WooCommerce website powered by WordPress.
Note: This tutorial is available in a written form and in the form of a video tutorial.
If you prefer reading to watching the video tutorial, you can find it below the video.
If you prefer a video tutorial, you may watch it here:
Why install Google Analytics on your WooCommerce website?
Google Analytics is a web analytics software that can help you track, analyze, and understand the behavior of visitors to your WooCommerce store.
With Google Analytics, you can collect data on the entire purchase journey of your customers, right from when they first visit the website to checkout and payment.
This helps you identify trends like what products are selling the most, what your customers like, how you acquire your customers, where your customers are located, what marketing campaigns are most effective at driving sales, how user-friendly your website is, how fast your web pages are loading and so on.
Then based on this data that you collect through Google Analytics, your web design, marketing, sales and support departments work to improve the online experience of your customers and thus help increase sales and conversions.
Step 1: Create Google Analytics account and add your WooCommerce website property
Head over to the Google Analytics home page and click “Start for Free”,
You will then be prompted to sign in with a Google account.
On the Google Analytics welcome screen, click “Start measuring”.
Google Analytics Account Setup
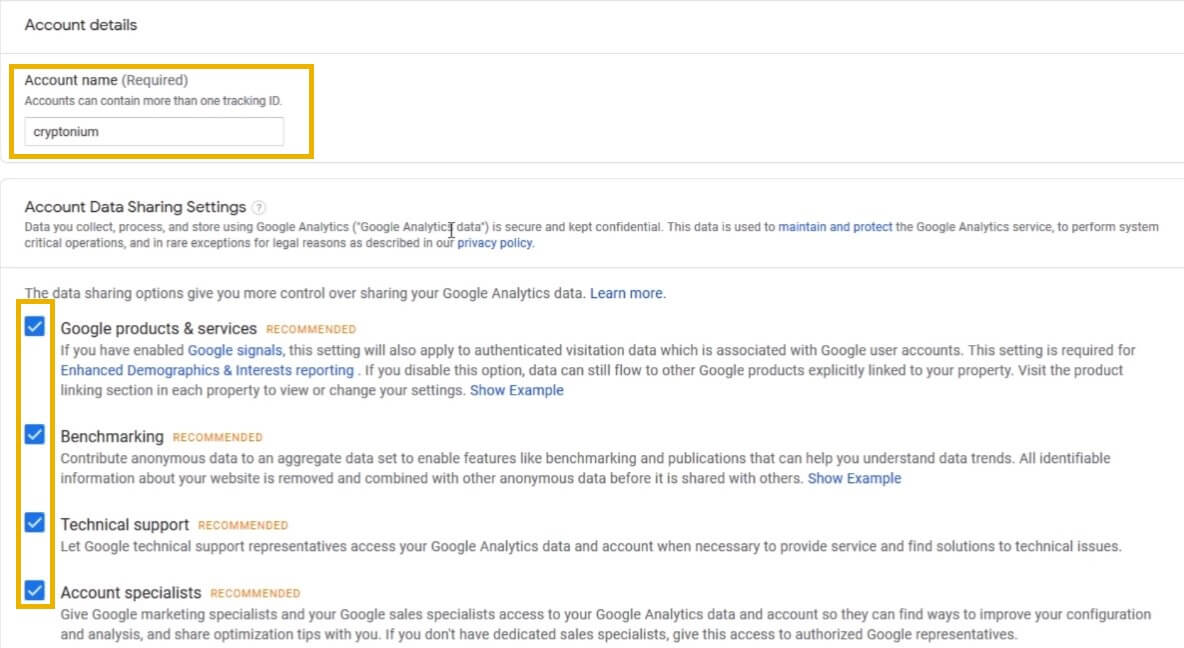
In the first step, you will have to create a Google Analytics account. Bear in mind that a Google Analytics Account is not the same thing as your Google Account.
We recommend that you set the name of your brand or company as the name of the Google Analytics account.
If you have more than one brand or company, you can create a separate Google Analytics account for each of those brands or companies.
After specifying the name of your Google Analytics account, make sure to enable all the recommended Account Data Sharing Settings before proceeding to the next step.
What do you want to measure with Google Analytics?
In the second step, specify if you are planning to collect web analytics on your website, or on your iOS or Android apps.

Note: at the time of writing this article, the ability to measure Apps and Websites with the same Google Analytics account is in Beta mode.
Setup Property on Google Analytics
In the third step, enter the details of the property that you wish to measure with Google Analytics.
Simply specify your Website Name, Website URL (with http or https), Industry category and Reporting Time Zone.
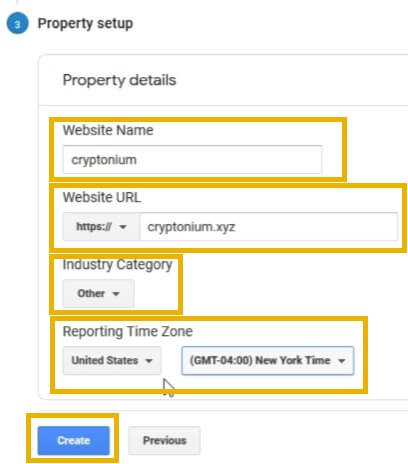
Click “Create” to save all changes and agree to all the terms and conditions to create your Google Analytics account.
Step 2: Enable Ecommerce Tracking in Google Analytics to track your WooCommerce store
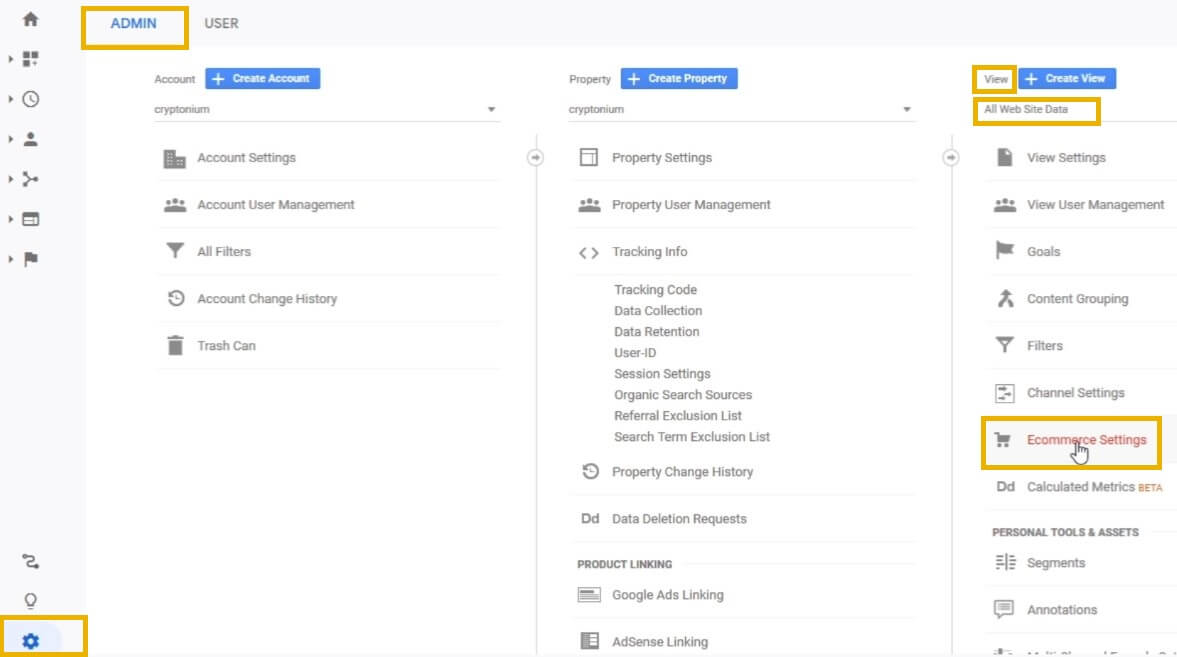
On the Google Analytics dashboard, click on the “Settings” icon (in the bottom left corner) to access the Admin area.
From the “View” column on the right, click on “Ecommerce Settings”, as shown:
In the Ecommerce set-up step, “Enable Ecommerce” and “Enable Enhanced Ecommerce Reporting”:
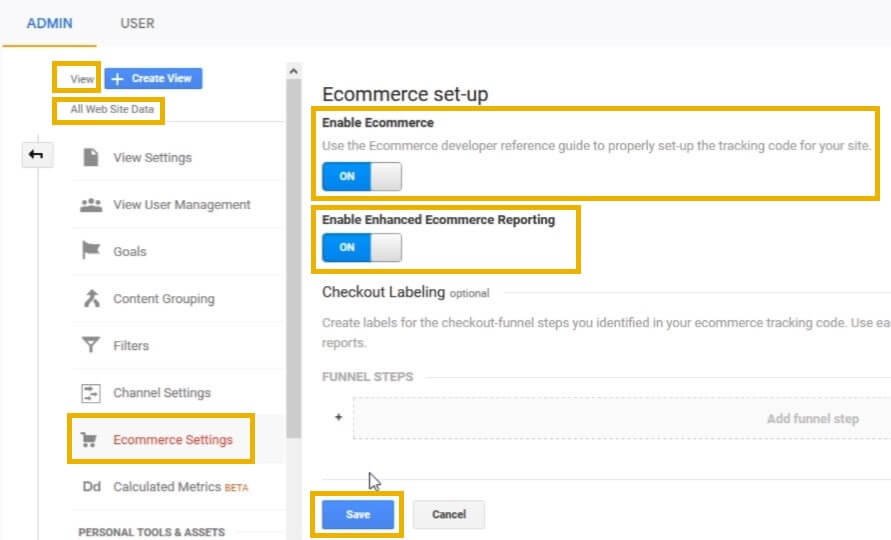
Click “Save”.
Step 3: Setup WooCommerce Google Analytics Integration Plugin to start tracking your WooCommerce website
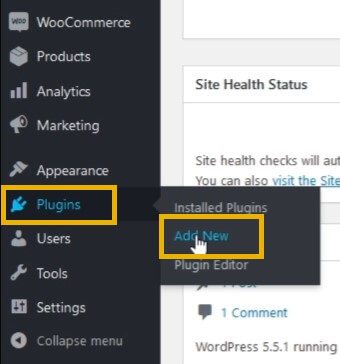
Next, login to your WordPress admin area and from the menu on the left, go to Plugins → Add New and search for “woocommerce google analytics” in the search bar on the right.
Look for the official WooCommerce Google Analytics Integration by WooCommerce, as shown below, and click “Install Now” and then “Activate” to start using the plugin.

To integrate the plugin with Google Analytics, go to WooCommerce → Settings → Integration → Google Analytics as illustrated:
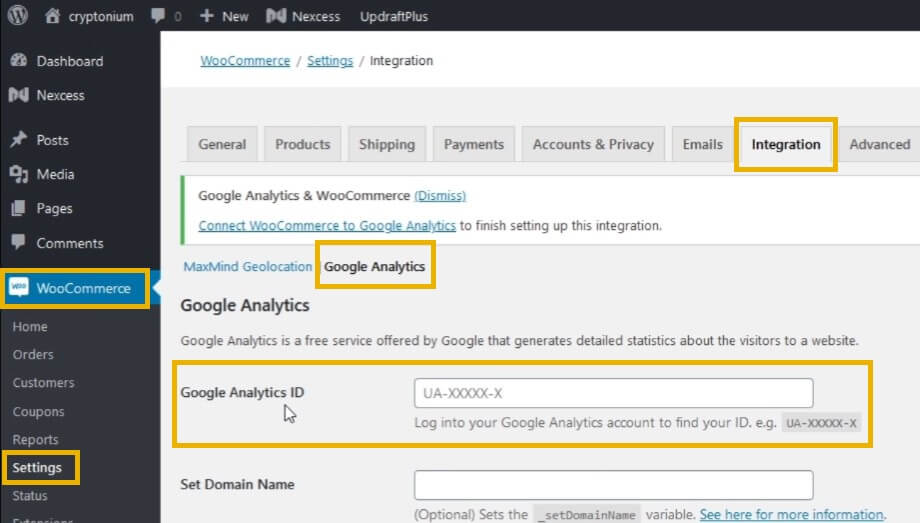
Now make the following changes:
- Add Google Analytics ID. This can be obtained from the Google Analytics dashboard under Settings → Admin → Property → Tracking Info → Tracking Code, as shown below. Make sure to select the right property.

- “Enable Standard Tracking”
- Enable “Use Enhanced Link Attribution”
- “Enable Universal Analytics”
- Enable “Anonymize IP addresses”
- Enable “Track 404 (Not found) Errors”
- Enable “Purchase Transactions”
- Enable “Add to Cart Events”
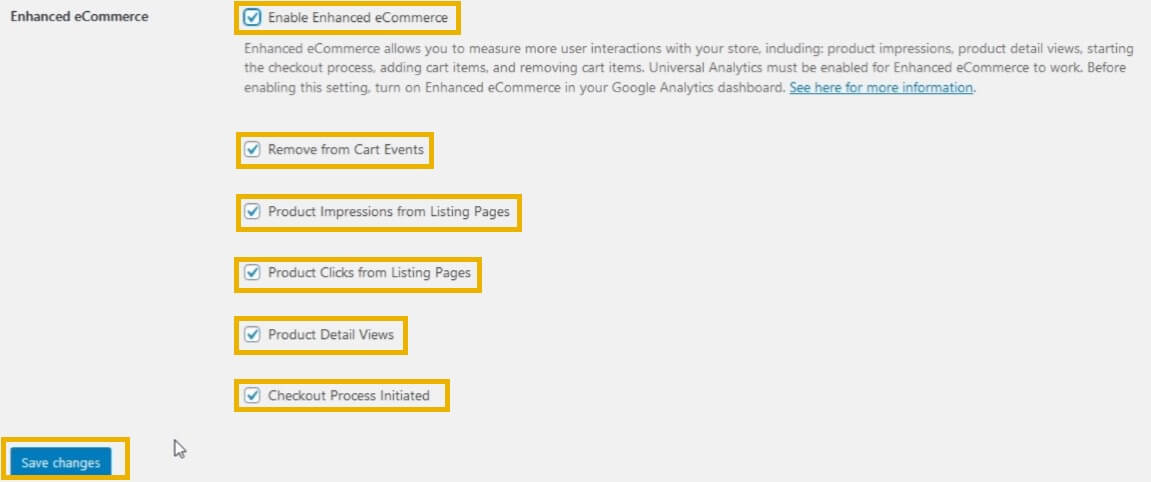
- “Enable Enhanced Ecommerce”
- Enable “Remove from Cart Events”
- Enable “Product Impressions from Listing Pages”
- Enable “Product Clicks from Listing Pages”
- Enable “Product Detail Views”
- Enable “Checkout Process Initiated”
Click “Save changes”
All of the above steps are demonstrated in the screenshots below.
![]()
![]()
Google Analytics will now start tracking your WooCommerce store.
Step 4: Setup Site Kit by Google to enable Google Analytics on the entire WordPress website
Although connecting Google Analytics to your WooCommerce store should theoretically start tracking your entire website, we have noticed that it does not track non-WooCommerce pages of your WordPress website, including your home page, for some inexplicable reasons!
In order to enable Google Analytics to track your entire website, we recommend installing the new Site Kit by Google plugin, which will enable you to install Google Analytics on your entire website.
Simply go to Plugins → Add New and Search for “google site kit”.
Find the official “Site Kit by Google” plugin and click “Install Now” followed by “Activate”.

To begin configuring the plugin, click “Start Setup” and Sign in with your Google Account:

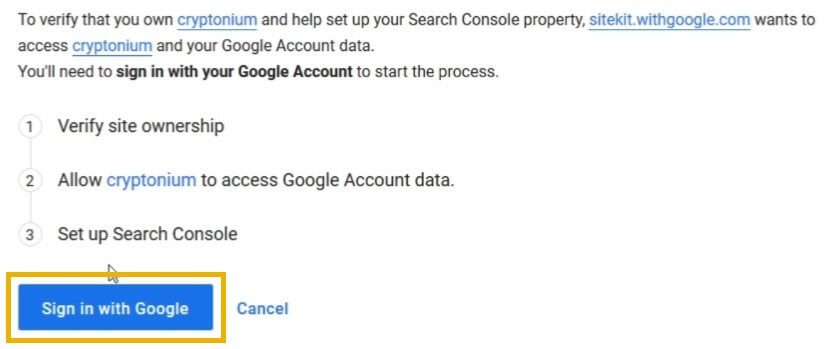
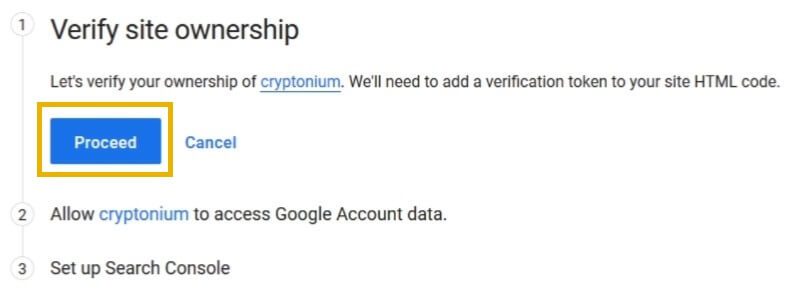
After you have granted all the permissions that Google requires, click “Proceed” to verify that you own your website. Google will add an HTML code to your website in order to achieve this:
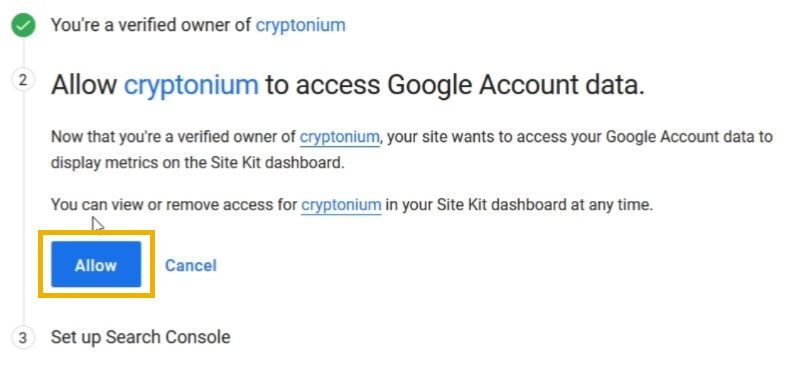
Next, you will have to allow your website to be able to access your Google account data so that it can display the metrics on the Site Kit dashboard on WordPress. To grant access, click “Allow”:
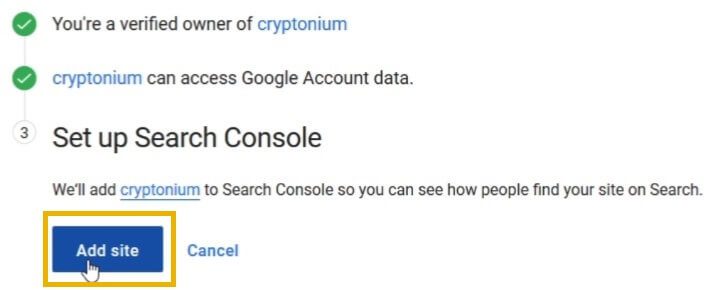
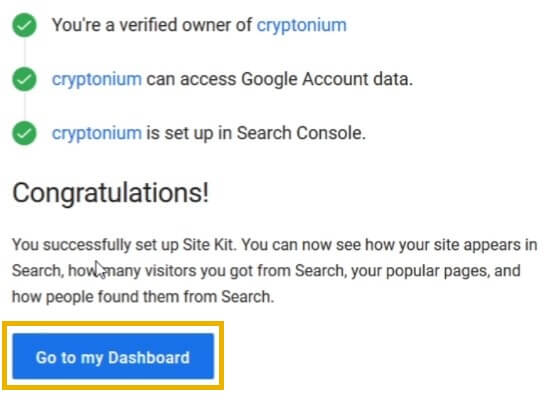
Next, click on “Add Site” to add your website to Google Search Console so you can understand how people find your website in Google Search Engine Results(SERPS):
Click on “Go to my Dashboard” to finish Google Site Kit setup:
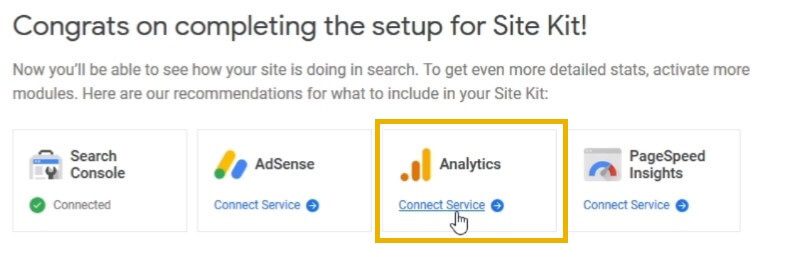
Next, click on “Connect Service” under Google Analytics to connect Google Analytics to your WordPress website:
After granting all the necessary permissions, the Site Kit plugin will notify you that it has discovered “an existing analytics tag” on your website, which was installed by the WooCommerce Google Analytics Integration plugin using your unique Google Analytics ID, as seen in the illustration below:
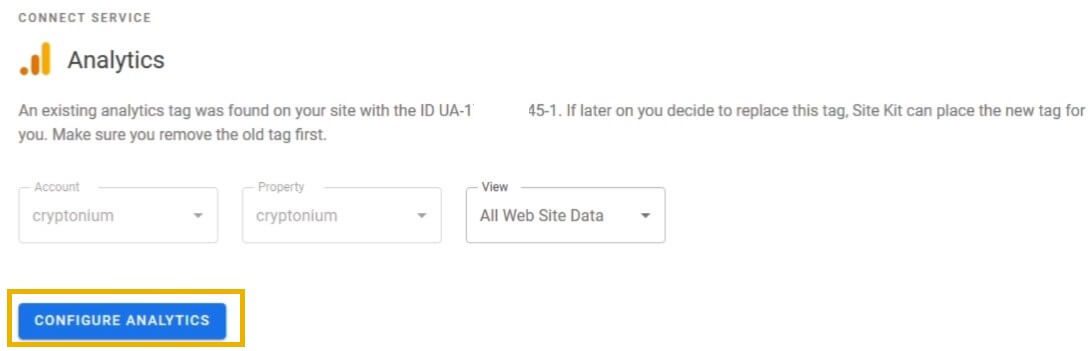
For the time being, you may ignore this message and continue to “Configure Analytics”.
Google Analytics will now successfully start tracking your entire WordPress website.
Step 5: Test Google Analytics configuration
To test if Google Analytics is working, head back over to the Google Analytics dashboard and navigate to Realtime → Overview reports:
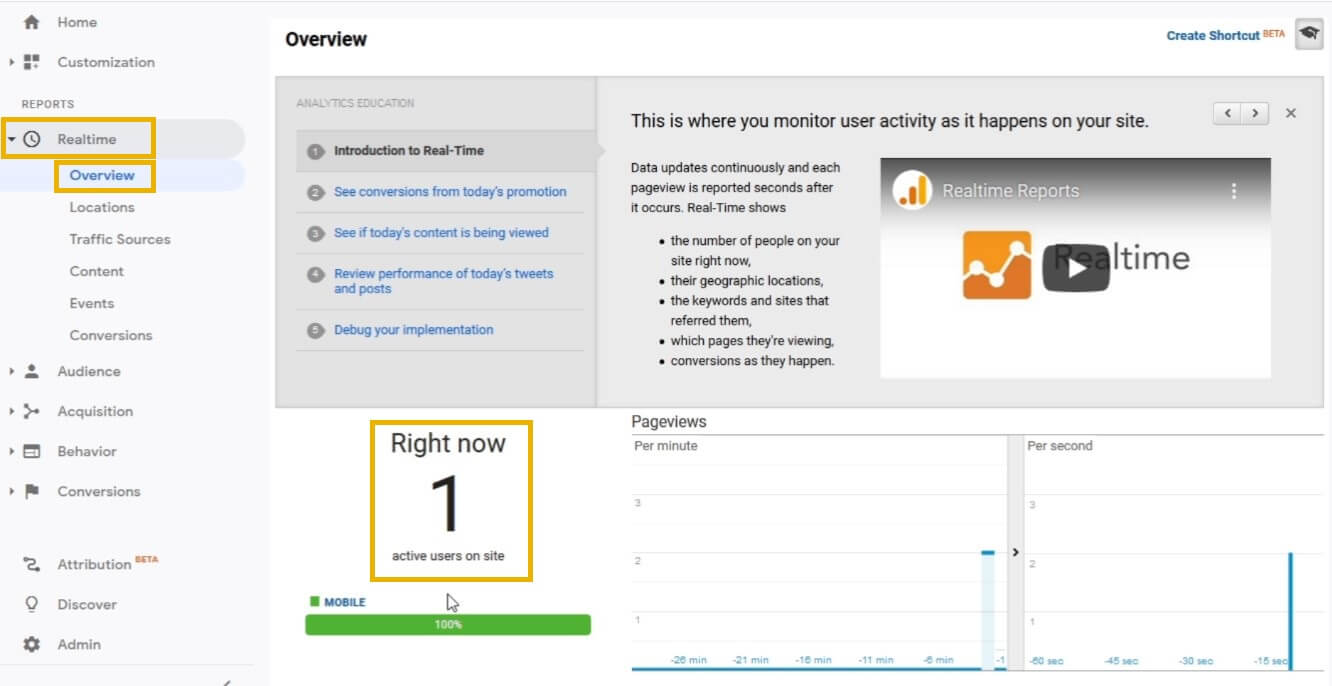
This Google Analytics report displays the current active number of users on your website in real time.
Now access the website from a new window or another device and as soon as you visit the website, Google Analytics will immediately update the active number of users that are displayed in your Google Analytics Realtime Overview report.
If the Realtime reports in Google Analytics do register such changes, we can conclude that Google Analytics has been successfully installed on your website.
Conclusion
If you have followed all the above mentioned steps correctly, Google Analytics should now be active on your website.
Please remember to allow Google Analytics about 24 to 48 hours to be able to collect data and report it in Google Analytics reports and on the Site Kit dashboard in WordPress.
Since you are working on a WordPress website, you may also find it useful to exclude WordPress admin traffic from Google Analytics.
Need Help?
We can setup Google Analytics for you. In addition to that, we also provide:
Looking for WooCommerce Hosting?
Check out our favourite WooCommerce hosting plan by Nexcess.
0 Comments